# Plugin WFN - Ambient Weather Unit Onboarding Instructions
{% hint style="info" %} As we embark on enhancing WFN's capabilities with a data lake upgrade and exploration of new use cases, we have temporarily paused the onboarding of the weather forecast nodes.
{% endhint %}
For Purchase of Ambient weather unit model, please go through the points (1) & (2) in [Plugin WFN Use Case - FAQ](https://docs.goplugin.co/use-cases/plugin-wfn-use-case/plugin-wfn-use-case-faq) & place your order by clicking this [link](https://ambientweather.com/2902d-plugin?NKAC=uSaxDa4NBJ\&referring_service=link) .
On this page, members will be guided to register in ambientweather.net and get the 'applicationkey' & 'apikey' to register your device on Plugin portal.
Members should follow the 'User Manual' provided with the device to connect the device with Wi-Fi and other installation steps. While setting up, please make a note of MAC address, which is used to register in step (III).
### I) Register in Ambientweather
* Signup in [**https://ambientweather.net**](https://ambientweather.net)
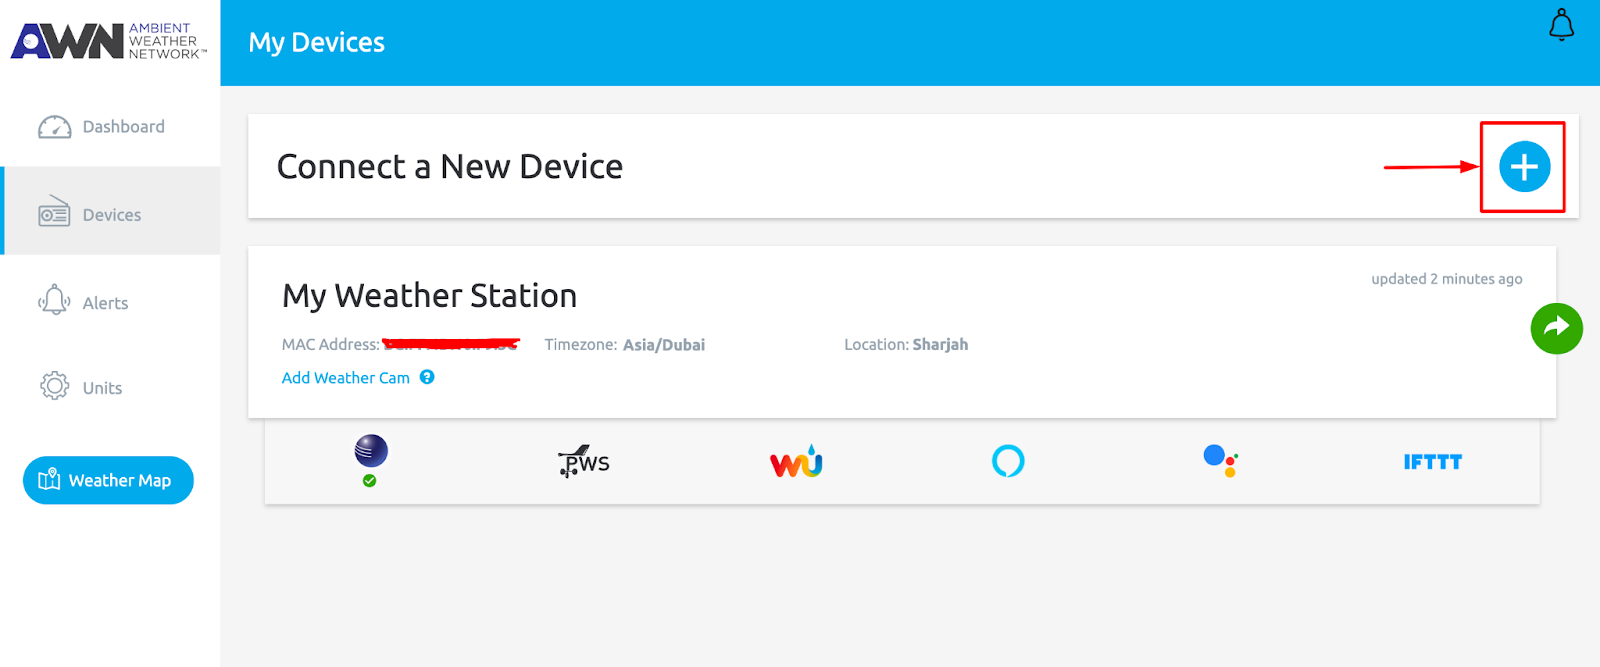
### II) **Click on Devices Menu and click on Connect a New Device button**
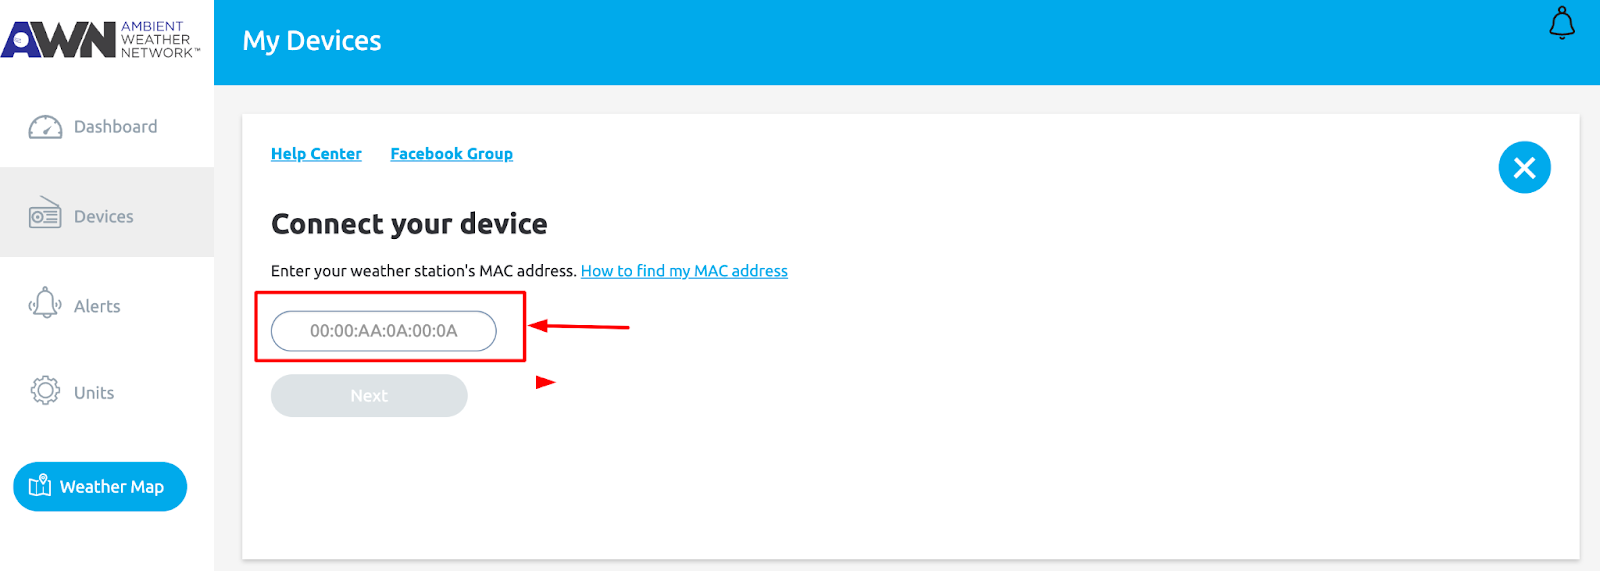
### III) **Enter the MAC address captured while setting up the device on Ip address 192.168.4.1**
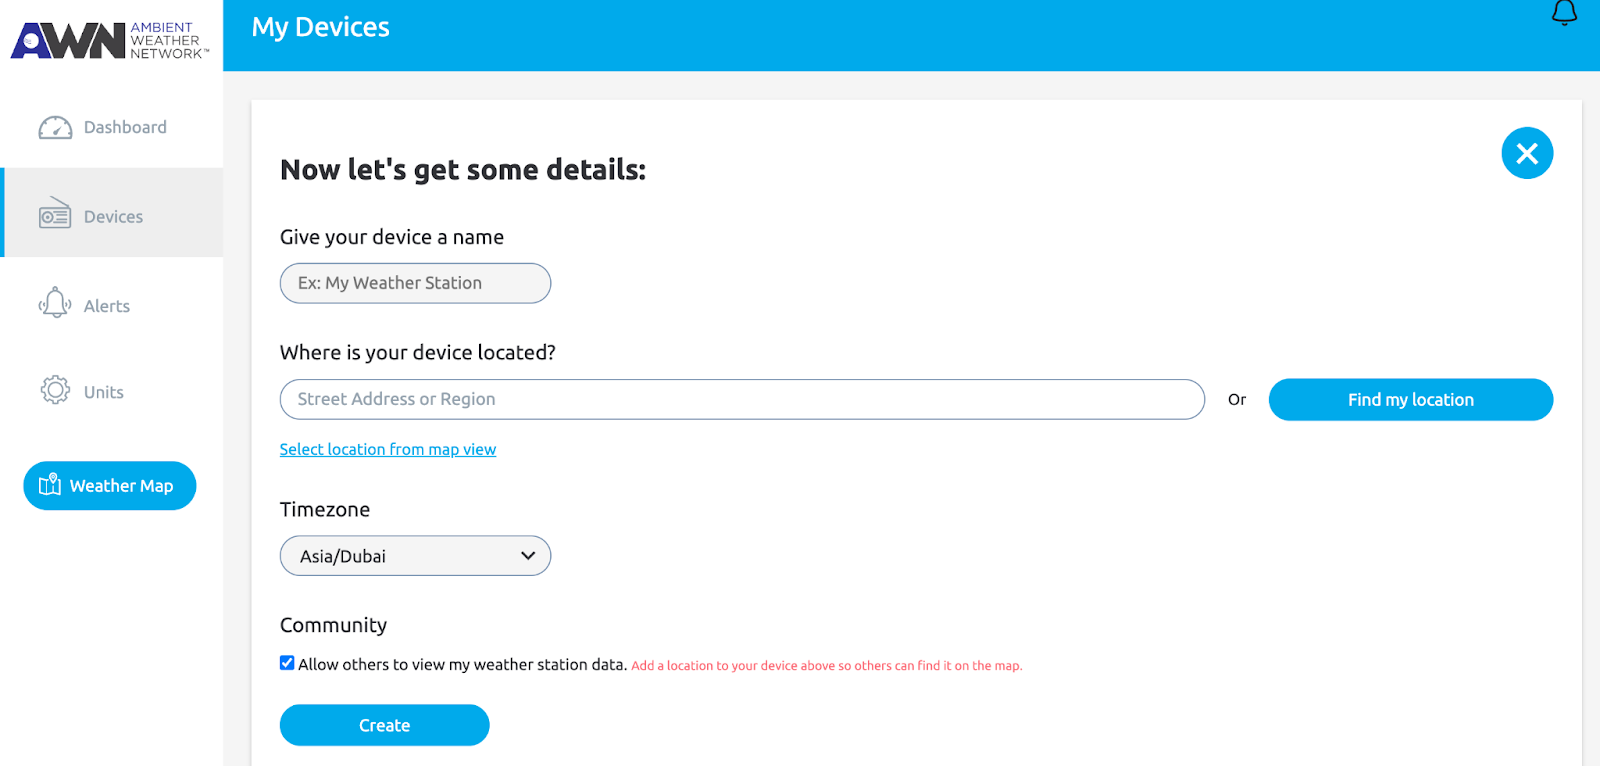
### IV) Click Next, in the following screen Enter the Device name, Select the Device location and Click on Create
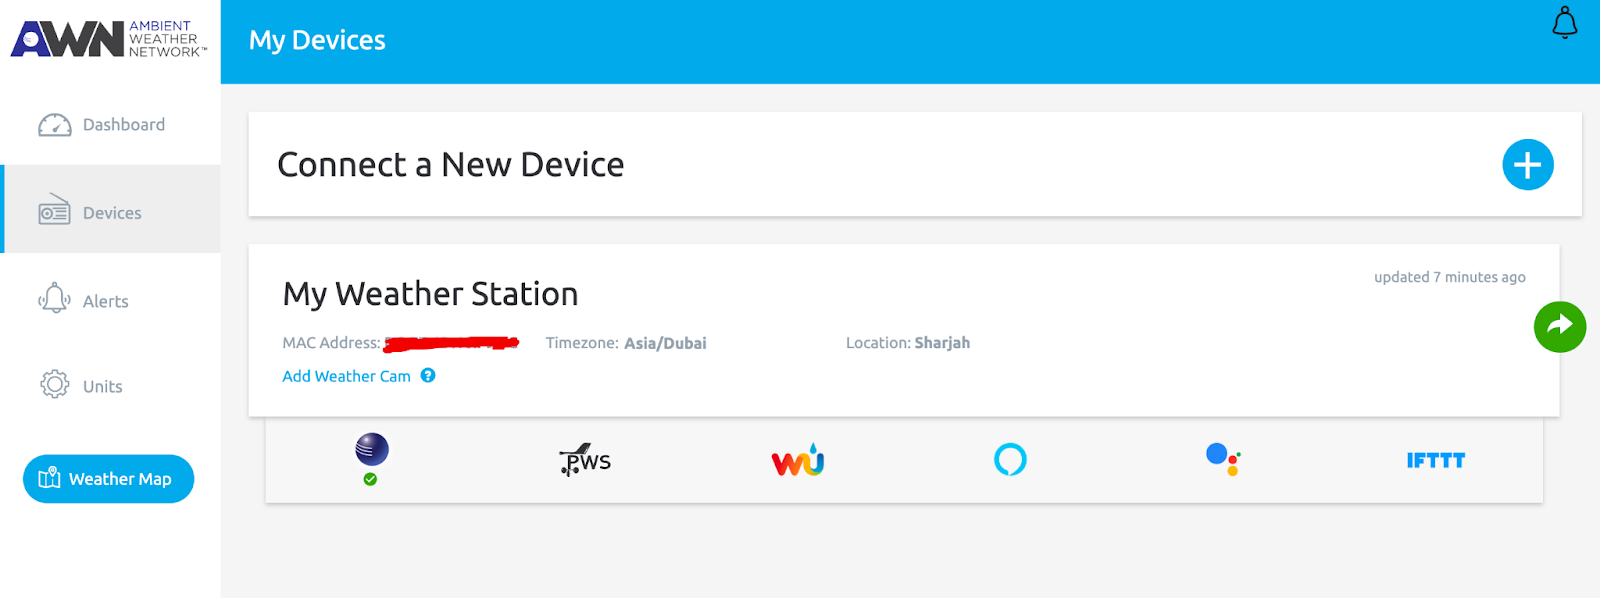
### V) **Once successfully added you will be able to view your Device on the homepage**
### VI) Click on the user icon as given in the image

### VII) **Create API key**

### VIII) **Create Application Key**

**NOTE**: Keep the API key and Application key generated in the above steps safe. This will be used in Step IX) for connectivity testing and the same will be used for registering your Device on the Plugin platform.
### IX) Testing Ambient Device for Data connectivity
Once you created the apiKey & application key for your device, you can check the data transmission from your device to the ambientweather.net portal by following the below-mentioned steps.
* Login to
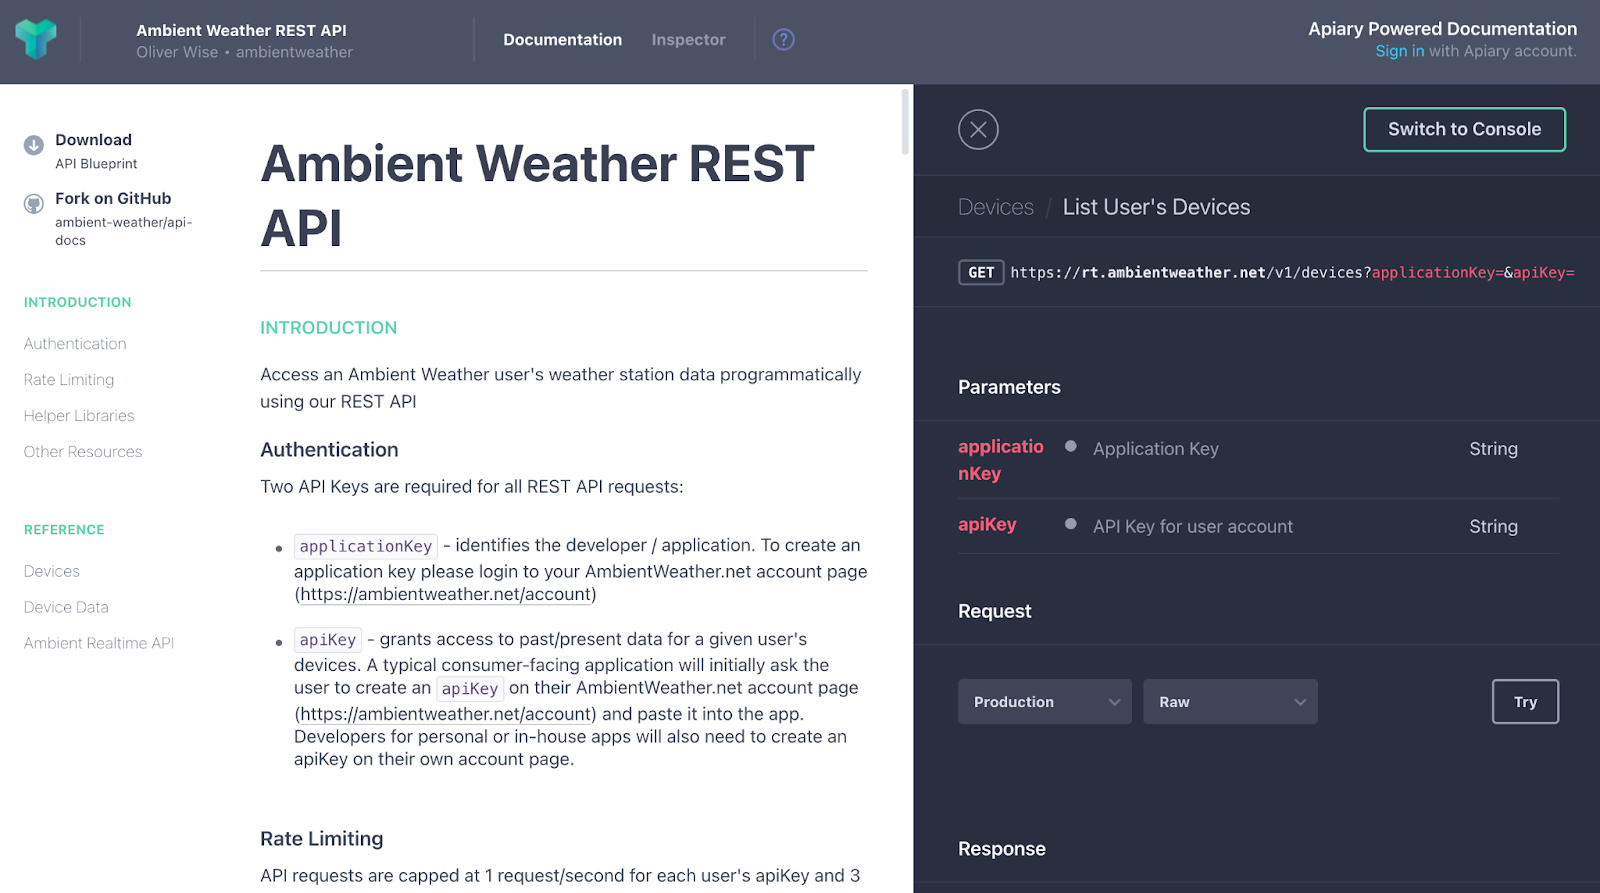
* Click on the "List Users Device as highlighted in the image

* Now click on the "Try" button and enter your apiKey & application key in the respective fields
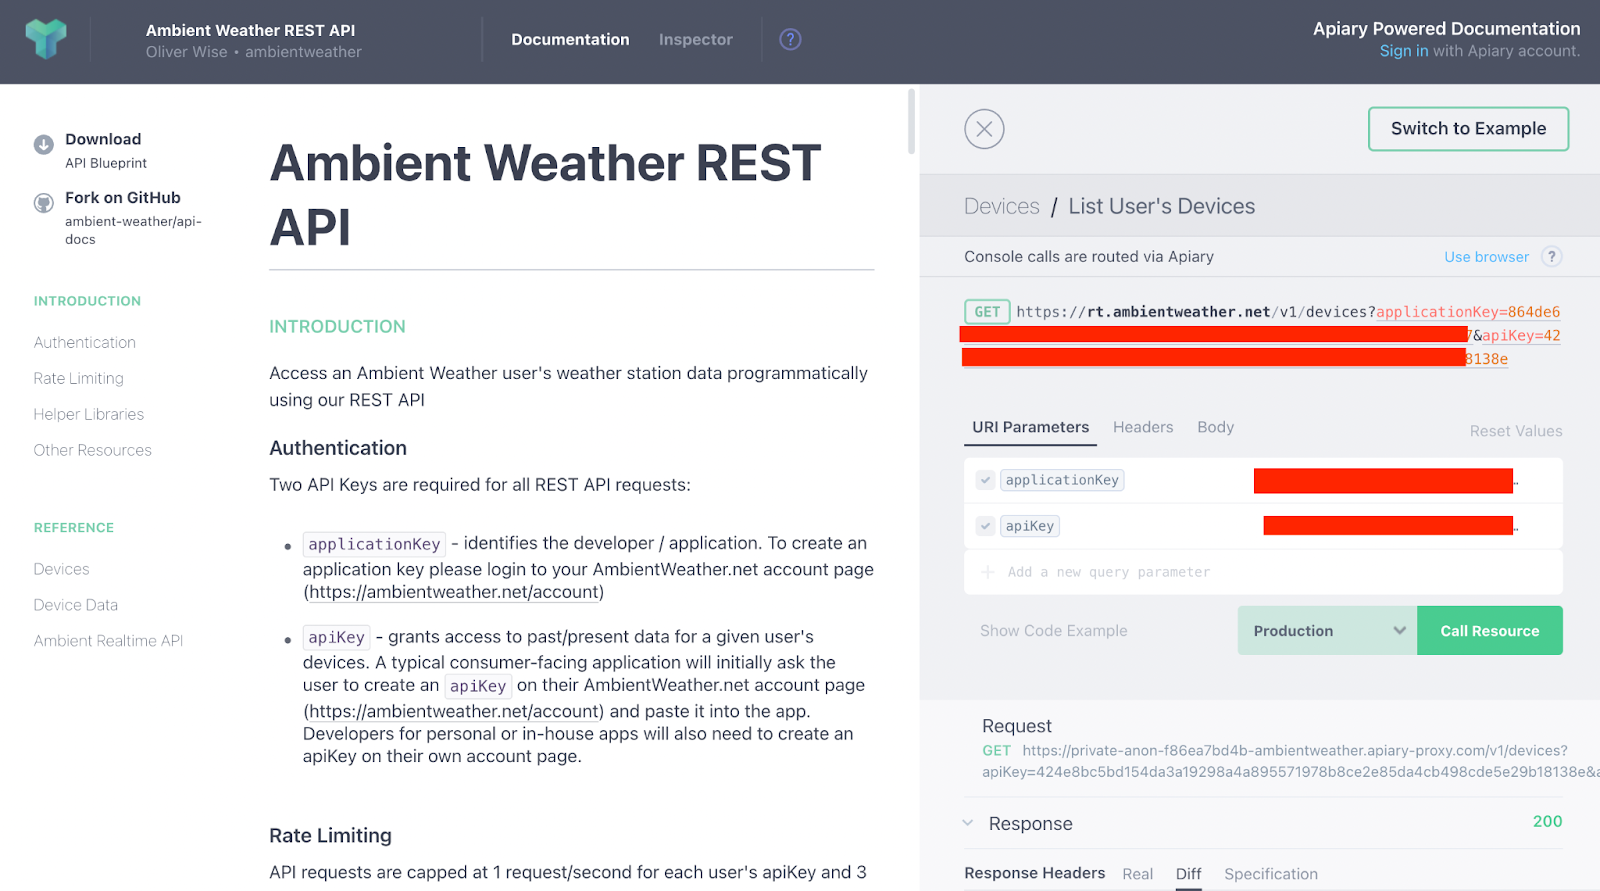
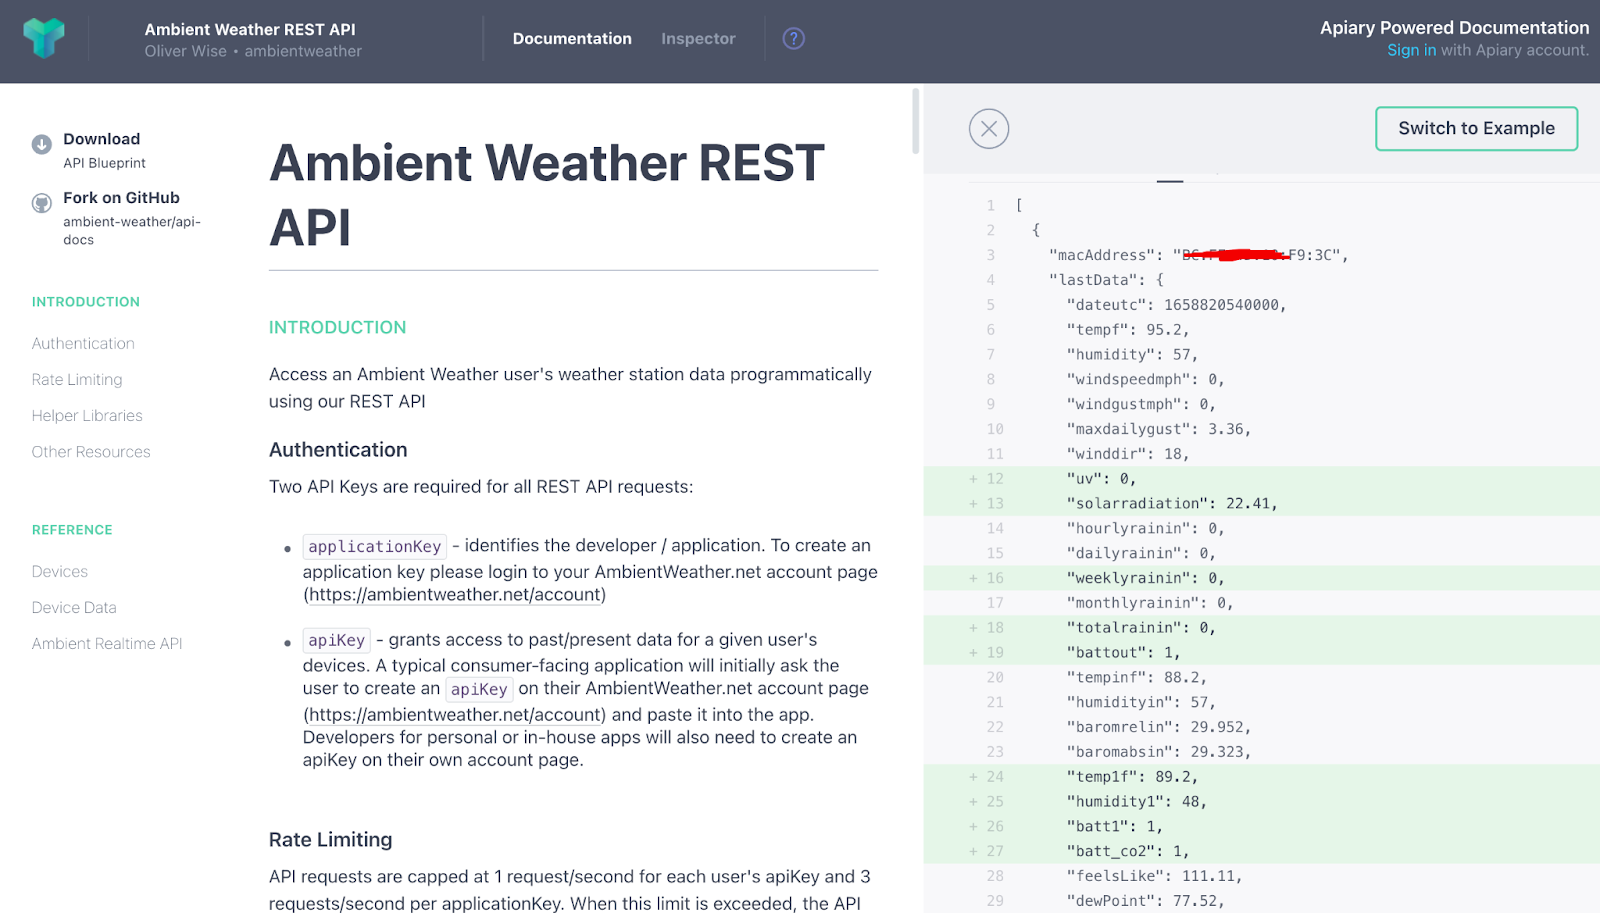
* Click on Call Resource and check the response. Once you get a successful response with weather data as given below, then you can register your device on the Plugin portal
### X) **Registering Ambient weather unit on Plugin Platform**
* Go to ‘’ click on ‘Tag My device’ and click on the ‘Add New’ button.

* In the ‘Add New Device Tag’ page provide all the details which you collected including applicationkey, apikey, latitude, longitude, country, state, city, zip code, wallet address etc., and submit for approval.

* Team Plugin will validate and verify your node details, if the data provided by the user fails then it will be sent back to the user with ‘Return for Clarification’ with appropriate comments, so the user can rectify the issue and send it back for Approval.
### XI) Staking for Weather node
* Once the node is moved to the 'Approved' state, the user needs to stake 1000 PLI & 5000 XDC to register as a data provider for the weather use case.
* To stake for Plugin WFN unit user needs to click on the 'WFN Stake' link provided on the menu.
 * You can see the 'Stake now' button on the 'WFN Stake' page, When you click the button it takes you to the 'Add New Weather Stake' page. **In place of 'No Approved Weather nodes Found.' you will get your Approved WFN device ID**. Select the Device ID and please read through the 4 points mentioned on the page for successful staking.

* Now, click on the 'Sign' button to validate your wallet account address. After signing in you will get a button to 'Stake PLI'. Click on the 'Stake PLI' button and allow the transaction to complete successfully. Then the 'Stake XDC' button will get enabled and you can stake XDC successfully.\
\
**IMPORTANT**: Please don't move out of the page or close the page while the transaction is taking place.
* After staking is done successfully the node details will be pushed into our 'Data collector engine' and your contribution to the weather use case starts.
---
# Agent Instructions: Querying This Documentation
If you need additional information that is not directly available in this page, you can query the documentation dynamically by asking a question.
Perform an HTTP GET request on the current page URL with the `ask` query parameter:
```
GET https://docs.goplugin.co/use-cases/plugin-wfn-use-case/plugin-wfn-ambient-weather-unit-onboarding-instructions.md?ask=
```
The question should be specific, self-contained, and written in natural language.
The response will contain a direct answer to the question and relevant excerpts and sources from the documentation.
Use this mechanism when the answer is not explicitly present in the current page, you need clarification or additional context, or you want to retrieve related documentation sections.
* You can see the 'Stake now' button on the 'WFN Stake' page, When you click the button it takes you to the 'Add New Weather Stake' page. **In place of 'No Approved Weather nodes Found.' you will get your Approved WFN device ID**. Select the Device ID and please read through the 4 points mentioned on the page for successful staking.

* Now, click on the 'Sign' button to validate your wallet account address. After signing in you will get a button to 'Stake PLI'. Click on the 'Stake PLI' button and allow the transaction to complete successfully. Then the 'Stake XDC' button will get enabled and you can stake XDC successfully.\
\
**IMPORTANT**: Please don't move out of the page or close the page while the transaction is taking place.
* After staking is done successfully the node details will be pushed into our 'Data collector engine' and your contribution to the weather use case starts.
---
# Agent Instructions: Querying This Documentation
If you need additional information that is not directly available in this page, you can query the documentation dynamically by asking a question.
Perform an HTTP GET request on the current page URL with the `ask` query parameter:
```
GET https://docs.goplugin.co/use-cases/plugin-wfn-use-case/plugin-wfn-ambient-weather-unit-onboarding-instructions.md?ask=
```
The question should be specific, self-contained, and written in natural language.
The response will contain a direct answer to the question and relevant excerpts and sources from the documentation.
Use this mechanism when the answer is not explicitly present in the current page, you need clarification or additional context, or you want to retrieve related documentation sections.